23 & 1/2 cups unpasteurised sheep milk*
1/2 tsp powdered rennet (see the picture of the type of rennet I used**)
1 cup of water
1/2 cup salt
1 to 2 tsp dried mint
* You can also use goat milk, but I used all sheep milk. In either case, ensure that the milk is unpasteurized!
** See pictures below for the rennet I used
Note that there are step by step pictures below.
1. Place the milk in a large pot on the stove. Remove 1 cup of milk so that you can make the anari cheese at a later stage.
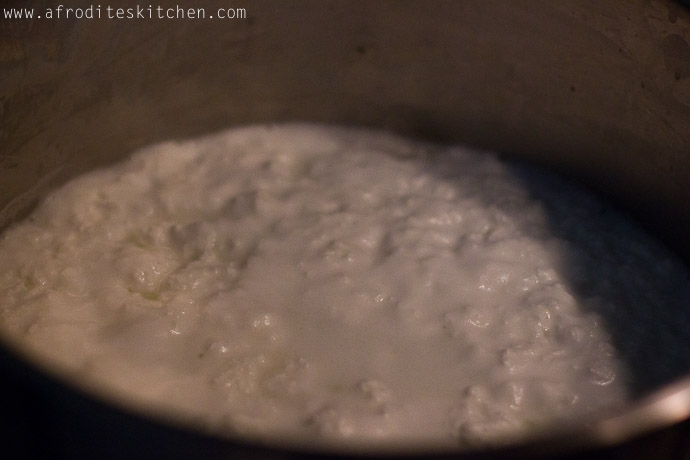
2. Heat the milk so it becomes luke warm. Once the milk is luke warm, take it off the heat, add the rennet and stir so that the rennet is incorporated. Then, cover the pot with a cloth and let it stand for about 30 minutes. This is when the milk will start to solidify and become “chunky”. You can tell it has become “chunky” because when you press the top of the liquid, it leaves a small dent, as in the picture above.
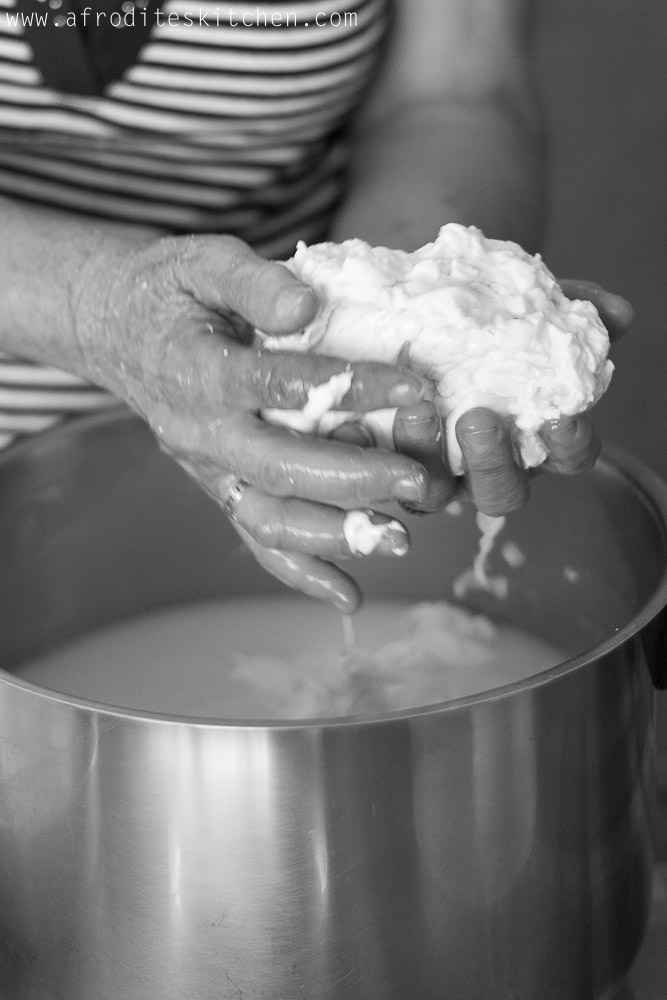
3. This means that your milk has begun to turn into cheese. Using your hands gently press the halloumi that has begun to form on the top of the mixture down to the bottom of the pot. Make sure your hands are clean, otherwise your halloumi will smell! (Yes, this means dipping your arms and hands right into that pot and pressing the chunky stuff at the top down!)
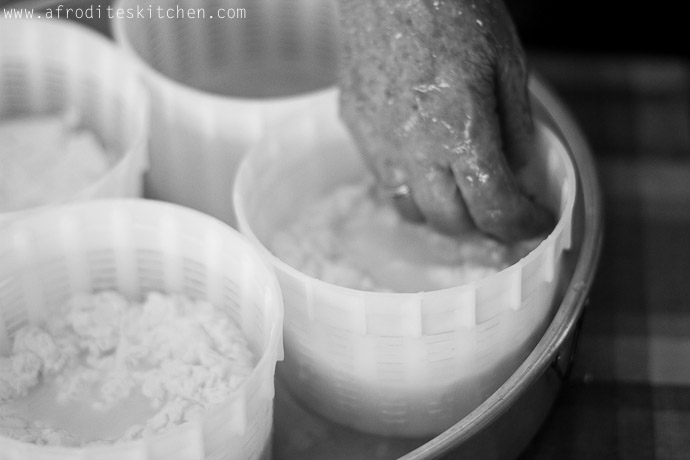
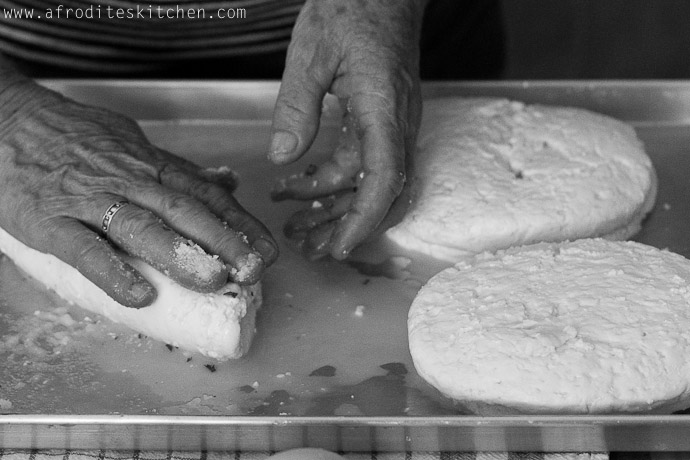
4. Then, using your hands, take out about a large handful of halloumi (about 2 cups) and put it in a cheese container (a plastic container with lots of holes) on a pan and very gently press down on the cheese with your knuckles to squeeze some of the liquid out. You will see the liquid pressing out of the cheese. Do this until the cheese in the pot is all taken out – you should have enough cheese for about 5 containers. Pour any excess liquid at the bottom of the pan back into the pot. See the pictures above for guidance.
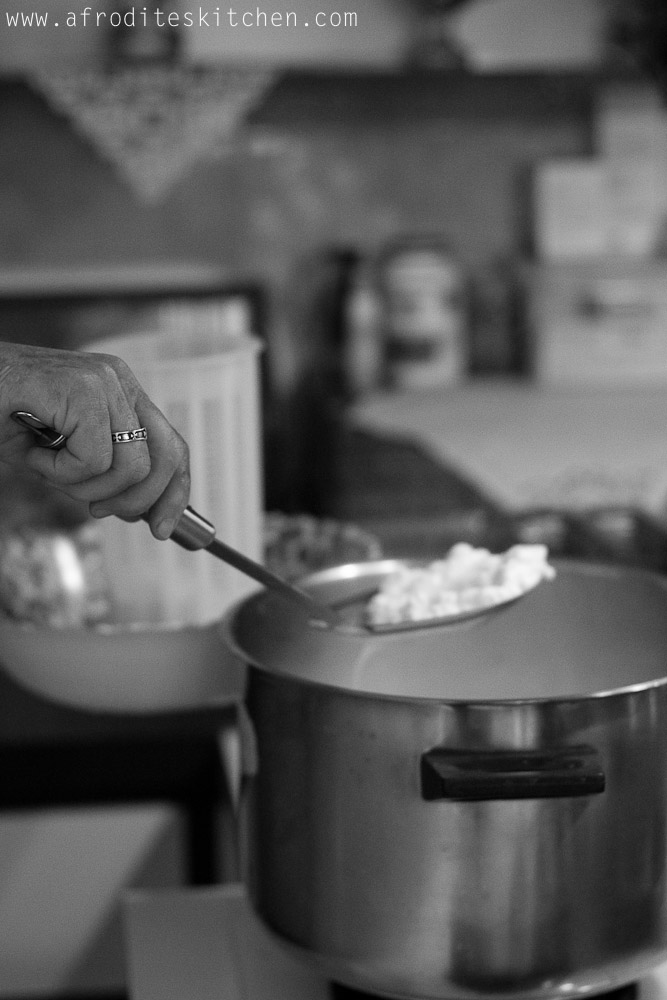
5. Ensure that there are no little bits of halloumi cheese left in the liquid in the pot. Use a strainer spoon to remove any little bits of cheese and add them to one of the cheese containers.
6. About 7 minutes after letting the halloumi rest in the cheese containers, use your knuckles and gently press down the cheese and turn them over in the containers, as shown in the pictures above. Be careful not to break the halloumi. Then leave the halloumi to strain again for 5 minutes. Pour any excess liquid at the bottom of the pan back into the pot. You can pile one cheese container on top of the other, this helps the liquid drain, but do not squish the top container down too hard on the other cheese, it should just rest there.
7. At this stage, make your anari. Place the pot with the liquid back onto the stove on high heat. Once the milk is hot but not boiling (you should still be able to touch the milk with a pinky finger) add the 1 cup of milk you removed earlier. As the milk is heating, stir gently with a large wooden spoon.
8. Meanwhile, after 5 minutes have passed, pour 1 cup of water over the resting halloumi and into the liquid that is gathering in the bottom of the pan. Let the halloumi rest for another 10 minutes. The reason we add water is to make the halloumi have a nice glossy shine. Take the excess water that has gathered at the bottom of the pan and add it to the pot. Continue to heat and gently stir the liquid in the pot.
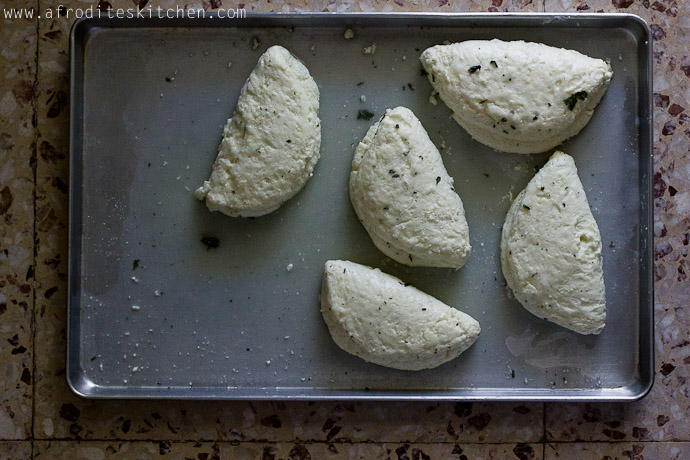
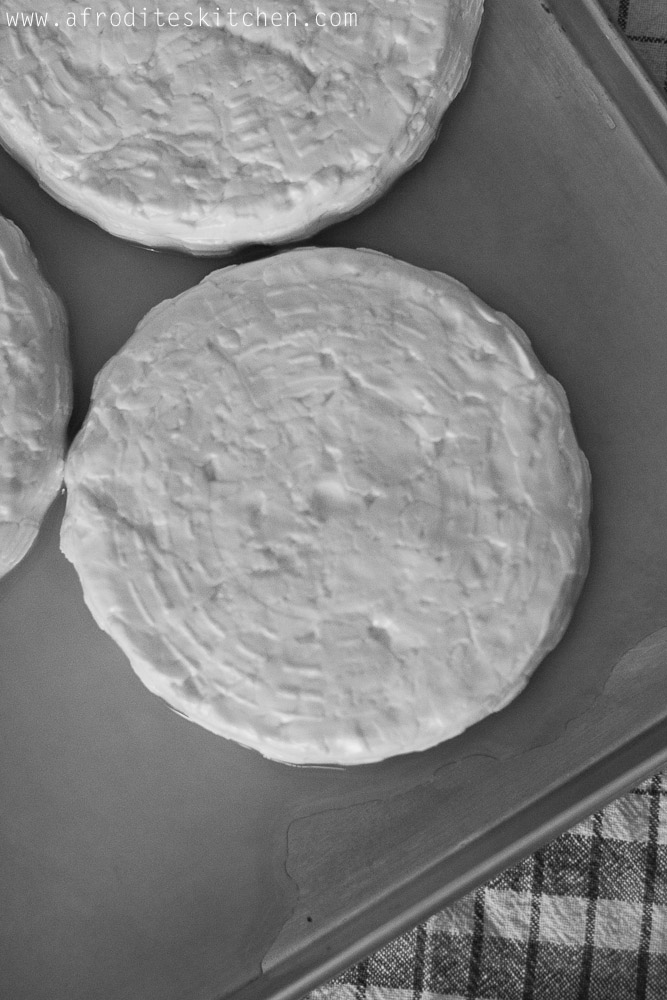
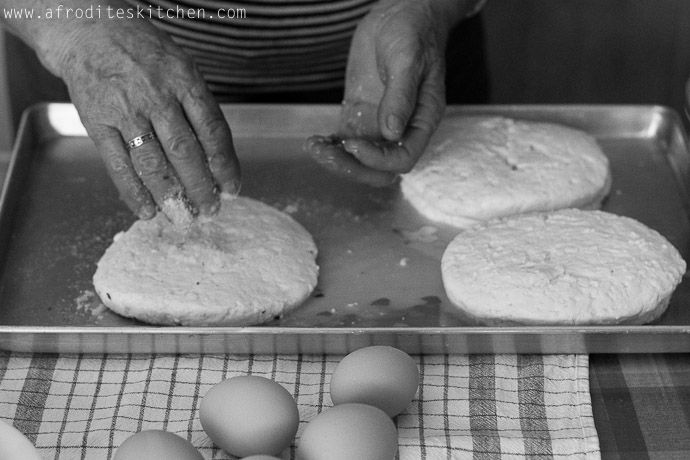
9. After the ten minutes have passed, take the halloumi out of the cheese containers and place them onto the pan as in the picture above. Let rest.
10. By this stage (13 to 15 minutes since you started heating the liquid in the pot to make anari) you will begin to see the anari starting to form. It simply looks like pieces of cheese floating to the top of the liquid. Stir until the pieces begin to get larger – about 1 minute. Then, turn the heat down to low and stop stirring the liquid. Instead, just place your wooden spoon in the middle of the pot and sort of gently wobble it around. Do this for about another 3 to 4 minutes as the large pieces of cheese will again get larger. Then, using a slotted spoon, gather the cheese and place it in another tall cheese container and let it drain on a pan. This is fresh anari and can be eaten and enjoyed with maple syrup, walnuts and cinnamon, as in this recipe here. You can also salt it and dry it to grate over top pasta. I have not covered this recipe yet.
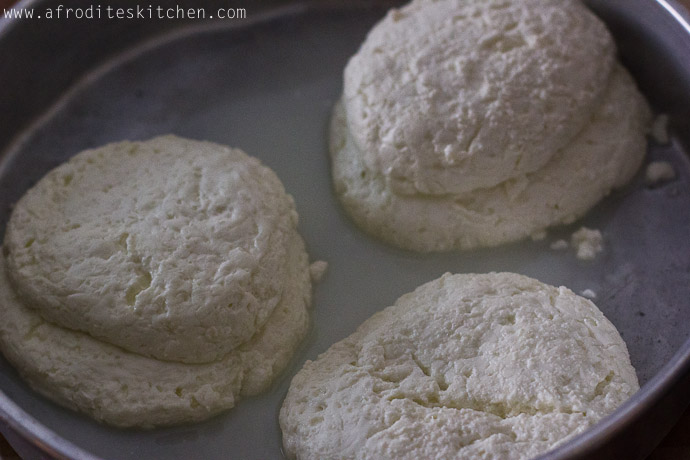
11. After you have removed all of the anari from the pot, turn the heat back into high and gently add the halloumis to the pot ensuring that they do not break when you place them in the pot. Gently stir the pot, only to make sure that the halloumis do not stick to the bottom of the pan. Do not break the halloumi when you stir. Continue to heat, gently stir and cook the halloumi for about 17-20 minutes. By this stage, the halloumi should have expanded and start to float themselves on the top of the liquid. Stop stirring the mixture and leave the halloumi to cook for another 10 minutes.
12. By this stage your halloumi should be ready. You can tell when the halloumi is ready because they are floating at the top and appear to be very soft and are naturally bending slightly in the middle.
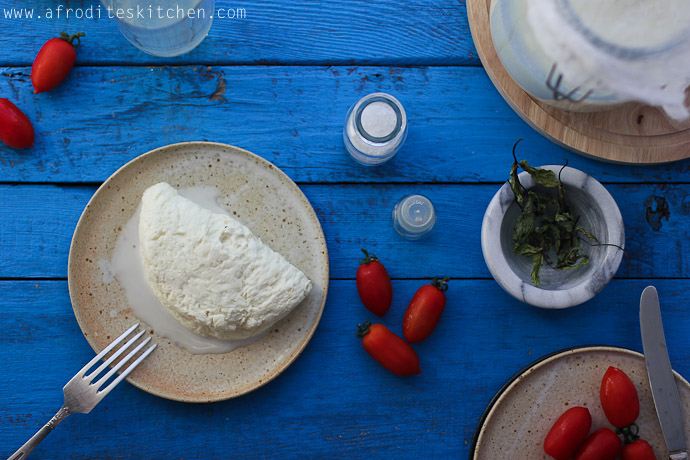
13. Remove the halloumi carefully from the pot with the a slotted spoon and place in a pan. You can place one halloumi on top of the other, in little piles as in the picture.
14. Prepare your halloumi seasoning. Mix the salt with the dried mint.
15. Then in a pan, take one halloumi and rub a very generous pinch of the salt mixture on one side of the halloumi. Gently turn the halloumi over and rub another generous pinch of the salt mixture onto the other side of the halloumi. (Remember to err on the side of too much salt as the salty taste will dissapear slightly when you place the halloumi back into the liquid.) Then gently fold the halloumi in half. Make all of the halloumi this way.
16. Place them in a clean air tight container and cover with enough liquid from the pot to cover the halloumi. Leave the top of the container open for about 24 hours, simply covering it with a cheese cloth to make sure no flies get into the pot. Then close the lid. You do not have to refrigerate the halloumi if you keep it covered with liquid. I ate mine very quickly anyway, so I am not sure how long it will stay good for outside of the fridge. Once you remove a halloumi from the container do not place it back inside otherwise it will turn the rest of the halloumi off. Instead, once you remove a halloumi from the bottle, keep it inside the fridge with no liquid, where it should probably last up to one week. Again, a lot of this depends on how clean your containers are when you prepare the halloumi, so freshness times may vary.


What an amazing post and recipe Christina. Your memories of your grandmother’s halloumi as a child are priceless. I’m glad you had the chance to learn making it though your aunt. Family recipes need to be kept alive!
Thanks for the step-by-step. I have made feta before and anthotyro as well as myzithra but never tried my hand at Cypriot cheeses. I will when I get the chance! Have a great trip to London and have fun at the food photography course. I am envious! 🙂 xoxo
Hi Magda! Thank you!! I’ve never made feta before, that sounds great. I wonder how it tastes compared to store-bought!? I am going to check out your blog and see if you have covered how to make feta there, it would be really cool to try that. I just came back from London yesterday. In case you are checking out any food photography courses in future, I can really recommend Aiala, she was a great teacher even beyond the basic photography stuff (she covered commercial aspects of food photograph, and post-processing), which was really helpful I thought. xxxx
Hi there!!!
I am a qualified Chef living in South Africa, born in Cyprus.
My grandmother also used to make the most amazing halloumi, unfortunately she passed away and none of my aunts or mom ever bothered to learn the recipe.
Looking forward to trying out your grandma’s recipe at the restaurant .
Regards,
Mario Kontaxis
This is absolutely fantastic!! You’re a kitchen goddess — halloumi is one of my favorite cheeses ever (especially flaming.. eeee) and yours look divine. Thank you so much for sharing!
haha, thanks Cynthia!! I LOVE halloumi with honey and sesame seeds – brings a totally new dimension to it that I never thought existed! I will try and post one of those in a future posts! (As I love flaming cheese too! 😀 ) xxxx
Hi, I would just like to say by pure accident I came across your website. I love the look, absolutely wonderful pictures of food and beautifully propped/styled : ) . Strangely I made hallo ump a couple of weeks ago with my mother and it tasted Devine. Will be making again in the near future, just need to find somewhere in London that sells Rennet (my mums in Manchester, she got it from a neighbour)
Hope you enjoy your food photography course even that I think you are a natural and should find a publisher to publish all your wonderful recipes with great pictures : ). We are in Cyprus between 20thAugust/3rd September. Do you organise any food events?
Have a good evening. Kind Regards, Artemi (photographer based in north London)
Dearest Artemi, thank you so much for your kind message! (I got the later one too, but I just logged into my website as I was in London for a few days, so decided to post your first beautiful message!). Your words really mean a lot to me – thank you. 🙂 I would love to publish a book and hope that I will (at some stage!). I am not organizing any food events yet – but hope to starting next year. If you wish, feel free to email me and let me know what types of food events you are after and if I can think of an experience I will happily point you in that direction. Also – I hope you are able to find rennet in London – I am sure they will have some, somewhere?! If not, you will easily find it over here! xx Christina
Good Morning, I did leave a rather long reply yesterday but it looks like it didn’t save? To say it again in a shorter way: I think your website/food/photography is absolutely wonderful, very inspiring. I also made halloumi with my mother 2 weeks ago and do intend to try by ourselves when we manage to get hold of some rennet in London. We are traveling to Cyprus in August, do you do any food events.
Kind Regards,
Artemi.
(London based food photographer)
Homemade halloumi is just blowing my mind… Thank you so much for sharing this recipe and through that your grandmother’s spirit. Recipes like these are so very special.
Hope you have a lovely Sunday,
Sini
Thanks Sini for stopping by and your kind words! Much love, Christina xx
I LOVE halloumi. Whenever they have the veggie kebabs/skewers, I keep all the halloumi and eat it last cus it’s so good. This is amazing that you can make it at home, and what a story behind it! I’ve never made cheese at home, but hey, one day maybe!
Hi Shikha, haha, that made me laugh because I do the same thing whenever I have veggie kebabs too! I was really scared to make cheese at home (and also this other recipe I posted for trahana which is a kind of dried wheat) but it was OK as long as you know the little details which I was lucky enough to have my aunt tell me. So I hope if you do decide to make it one day, this recipe works well for you!! Thanks for reading Shikha and your kind words! xx
What a wonderful post, but just wondering where did you get the sheep raw milk from?
Hi Sameh! It really depends where you live? If you are in Cyprus, you need to ask around a little bit – approach a local butcher or grocery store where you see fresh anari on display. Then ask if there is someone you can buy the milk from. I usually ask my local butcher because she makes and sells anari and halloumi, so she is able to sell me some of her milk! Let me know how it goes. If you are in Limassol, maybe I can try to ask my butcher for you.
Now this South African can make her Zenon happy with cheese from his homeland
Many thanks
Haha, that made me smile! I hope the recipe works out well for you Loretta!
Hello, how do I dry out fresh Anari?
Hello. Unfortunately, it is illegal to use unpasteurised milk in Australia. I just came back from holiday in Cyprus with several bottles of rennet. Would you recommend using unhomogenised milk, as this is a bit creamier and thicker than ordinary pasteurised milk? What about adding cream to thicken it? My mum, theia and I want to start making it soon.
I know this is a silly question but “where can I buy the rennet as I see not just any store would sell this product?” I would much appreciate your help on that .
I have just read the recipe, thank you so much for sharing. This is on my to do list and I can’t wait to try this out. Next time I’m in Cyprus I will get the rennet and then source the sheep or goat’s milk back in the UK. I too have memories of my aunty making halloumi and anari in Kormakitis in the 80s. x
Hello just found your site, I am very impressed with your content, could I please ask you if you were not to add salt could you keep the halloumi in a freezer?
I am not certain where you are getting your info, but good topic. I needs to spend a while learning much more or working out more. Thank you for fantastic information I was in search of this information for my mission.